
How to Fix Reeds Without any Reed Tools
2020 has brought countless challenges to all. The first stay-at-home orders in Washington state were put in place back in March, and musicians had to quickly adapt to conducting lessons online. After troubleshooting iPad positions that allowed me to see my students’ fingers while playing, my next biggest challenge was, “How will I help my students with their reed problems remotely?”
This led to a brainstorm of ways in which students are able to adjust their reeds without using any formal reed tools. Some are simple, only involving your fingers. Others require tools you might find around your house. Some are fairly common practice, things that I do myself to my own reeds. Others were worth experimenting in order to satisfy my curiosity, but I would not recommend them to anyone with little experience with reeds!
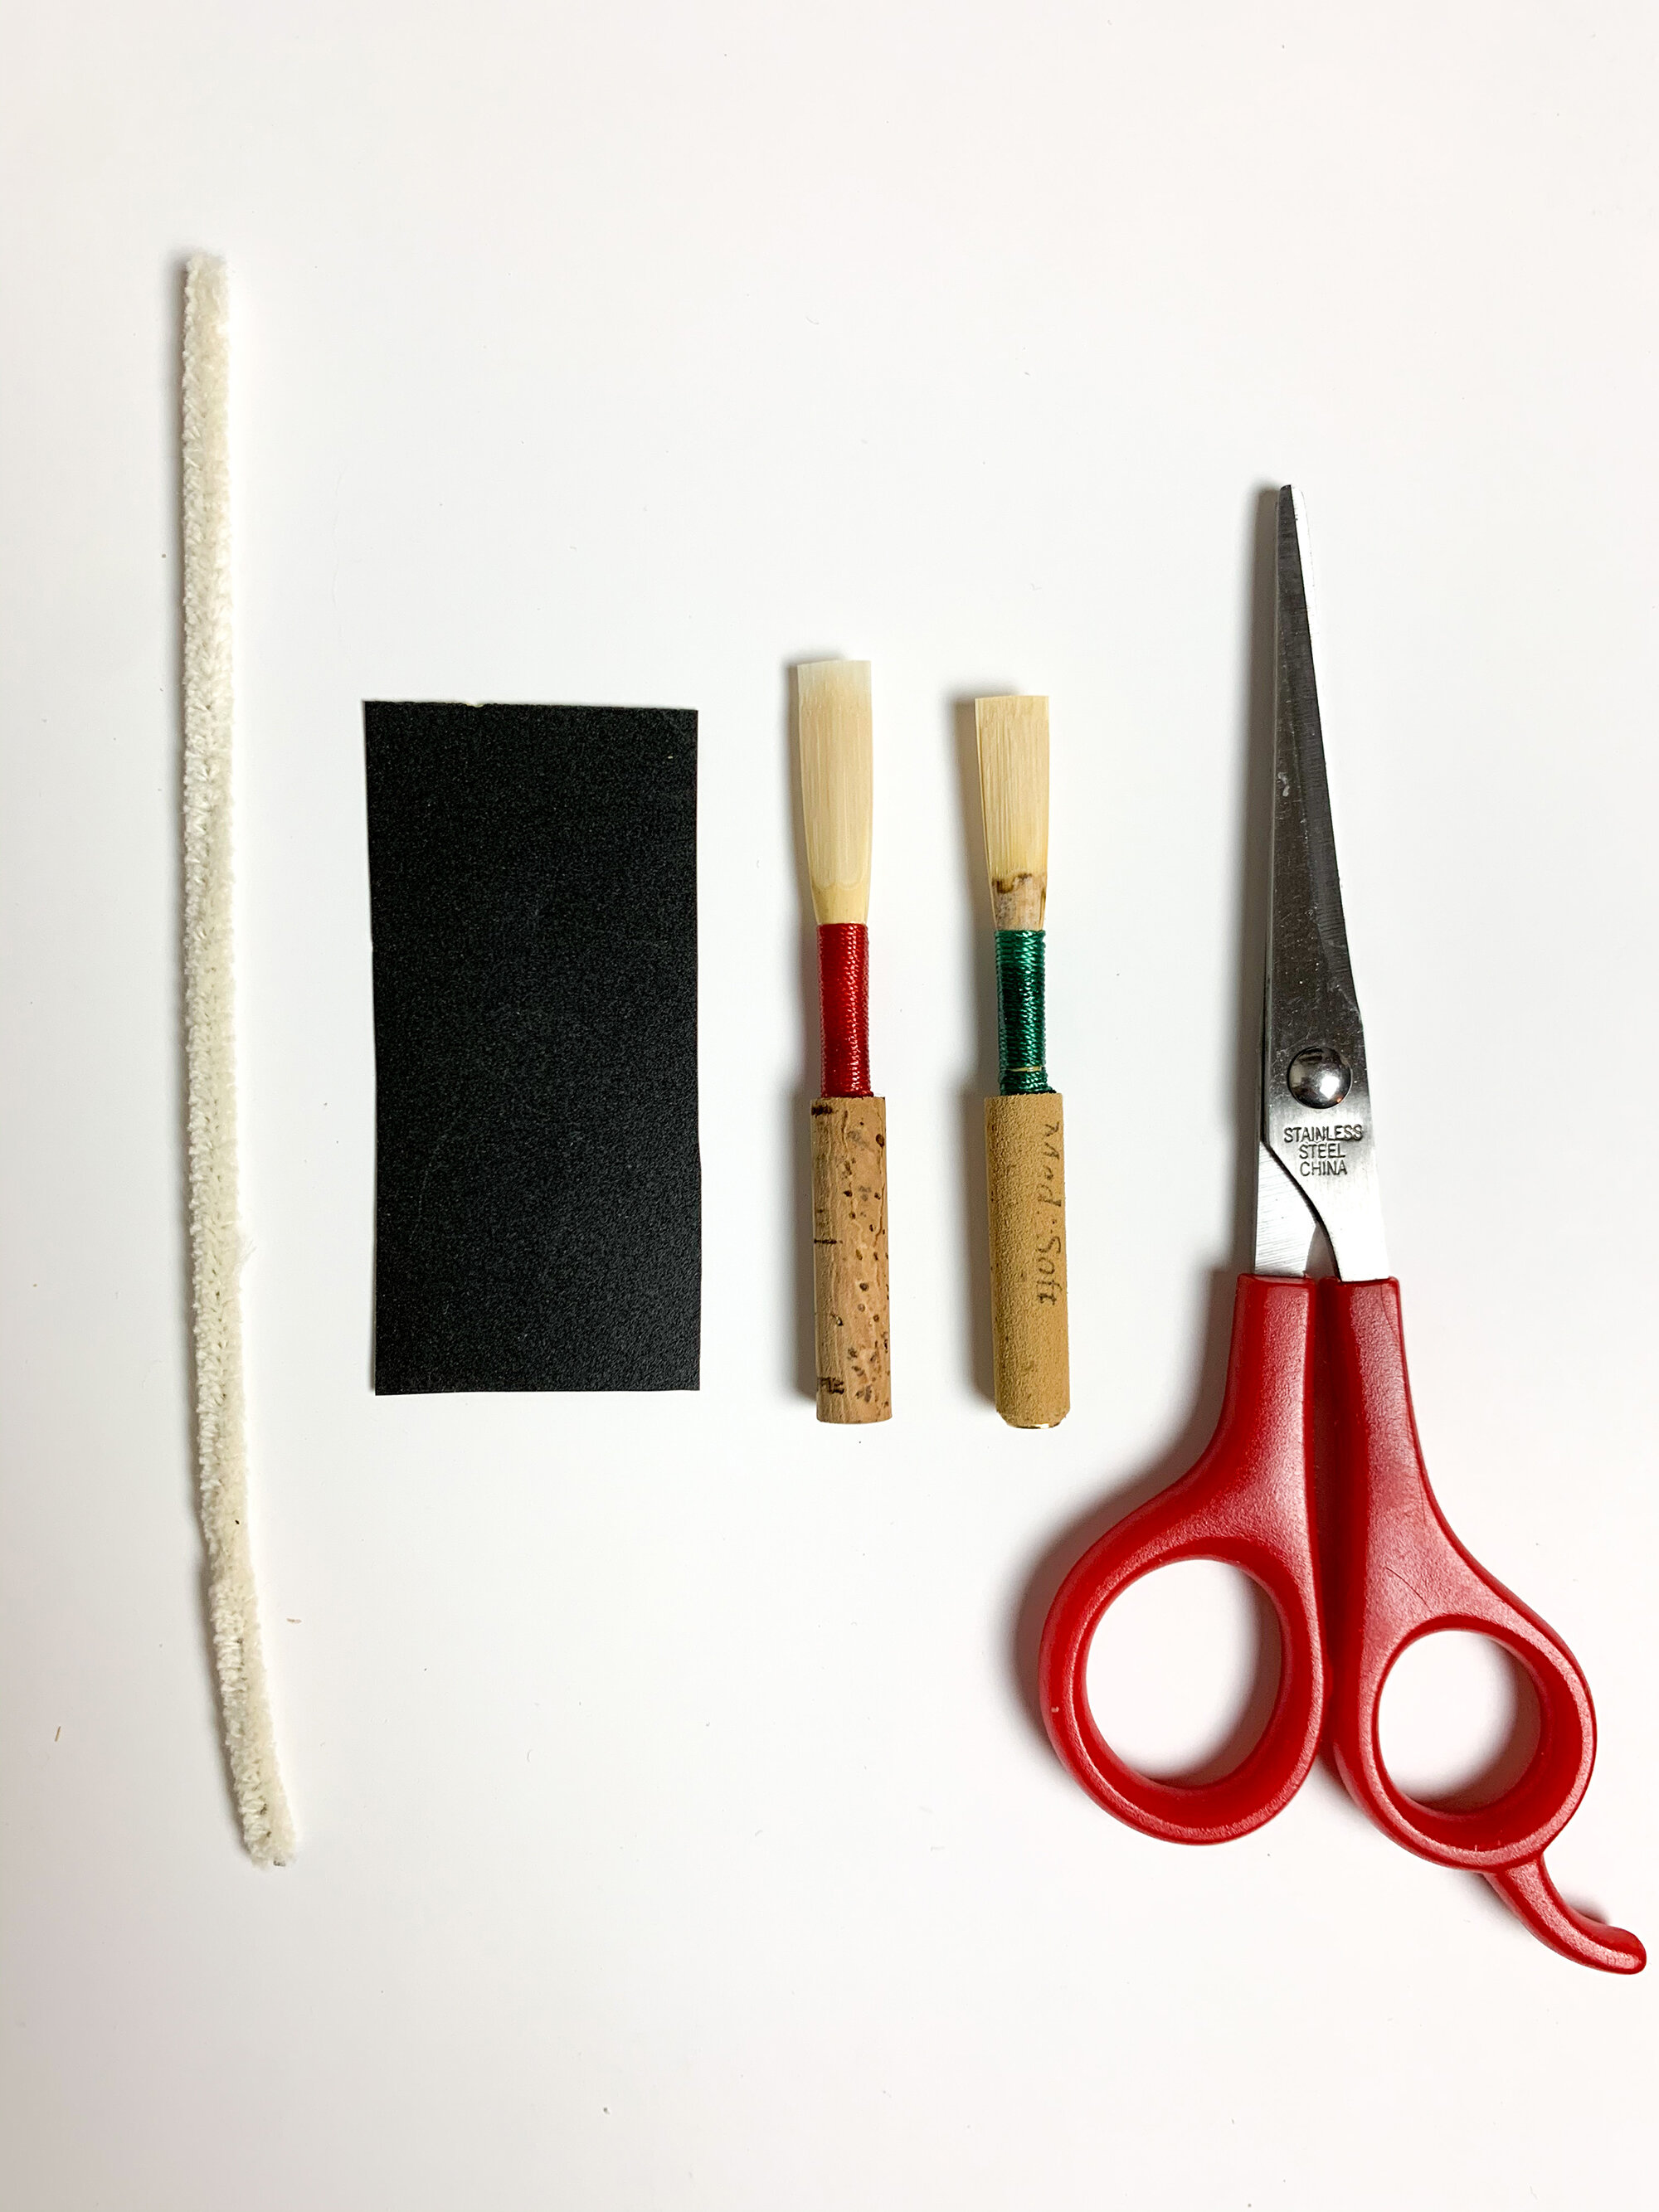
To test each of my techniques, I wanted to simulate the situation of a student who wants to improve the feel and sound of their music store-bought reeds but doesn’t have access to a teacher with reed tools. To do this, I purchased two reeds off of Amazon from some widely known student oboe reed brands. I also gathered some tools that I thought the typical household might have laying around somewhere: a razor blade, sandpaper, and scissors. (Can you guess the method I experimented with and would not recommend?)
Here is a diagram labelling the parts of the oboe reed. I play on long scrape reeds, and you or your teacher may have different names for these sections. These are the names I will be using throughout this guide.

However, before I began testing my methods, I first needed to figure out what I wanted to change about the reeds!
Identifying Your Problem
You can’t fix a reed if you can’t pinpoint how you would like it to be improved. The following method lays out how I determine what my reeds need.
Peep or crow on the reed alone. Get a sense of how it feels, and listen to how it sounds. Do the same with the reed in the oboe, playing a few notes with your best, most solid airstream. Pay attention particularly to:
RESPONSE. Is the reed hard or easy to blow against? Would you be able to play this reed for a while without getting tired?
INTONATION. Is the reed flat even when you try to speed up your air to get it in tune? Is the reed mostly in tune, but flat in the high notes?
TONE. Does the reed make you sound buzzy and tippy? Does the reed make you sound stuffy and muffled?
When we make changes to our reeds, we address our problems in order. Response is the most important; there’s no point in having an in tune reed with beautiful tone if it’s too hard, and you can only play it for a minute at a time! After getting the reed so it responds very comfortably, we adjust the intonation. The majority of the time, once the reed is responding well AND is in tune, then the tone usually sounds how we would want it to sound.
The methods I will describe below also follow this flow. The most frustrating issue that students run into with their reeds is response. When the reed is too hard, it’s very discouraging to continue practicing! Once the response issue has been fixed, there’s a chance that the intonation and tone will be better as well.
Don’t forget to test your reeds!
No matter which of these methods you try, always remember to play your reed before and after you adjust it! This will help you observe whether your adjustment changed how the reed feels and sounds.
No Tool Solutions
Squeezing the reed closed

Squeezing the reed closed might seem like a no-brainer to people who have been playing oboe for a while, but during my virtual lessons I’ve been surprised by how many of my students didn’t know where or how hard to squeeze the reed closed.
To squeeze a reed closed, use the thumb and index finger of one hand to gently close and protect the tip of the reed. Then, use the thumb and index finger of the other hand to pinch down the back of the reed. If your reed is well soaked, the cane should be pretty malleable and you should be able to give it a generous squeeze without cracking the reed.
Squeezing a reed in this way does two things. Firstly, it closes down the opening of the reed. If you’ve played on many reeds with many different sized openings, you probably have found that the reeds with bigger openings felt harder to play. Sometimes newer reeds will also have bigger openings because the cane hasn’t yet had time to settle. Squeezing can help these newer reeds break in a little bit so that their openings are friendlier and the response is easier.
The second thing that squeezing can help with is expelling water from the tip. Sometimes when a reed has been soaking for too long, the waterlogged cane can be resistant to vibrations. The finger pressure can help squeeze excess water out of the cane so that it vibrates more readily again.
Third, squeezing a reed closed can help raise the pitch. When you close down the back of the reed, the inner cavity becomes smaller. In the same way that a flute produces a higher sound than a tuba does, a reed that has been squeezed closed can produce a higher pitch.
Pinching the reed open

You might have had experience with reeds that had tiny slivers of an opening. These reeds are frustrating to play because they will only make a sound if you use a minuscule amount of air! These reeds also tend to only play very weakly and quietly.
The first thing I would do with this type of reed is let it soak a minute or two longer than normal. As mentioned earlier, sometimes a reed will be more open when it’s full of water.
If the longer soak didn’t open up the reed as much as you wanted, you can pinch it open. Place your thumb and index finger on the edges of the reed and gently squeeze them together. Watch the opening of the tip to see how much it opens up.
There are two things to be careful of here! First, try not to pinch the reed in a way that will pry the two blades of cane apart. The reed will still play if you separate the blades, but it will likely become flatter and more flabby sounding. Second, be sure to use very gentle pressure when pinching the reed open. Bending the cane too aggressively in this way can weaken it.
Sliding the Overlap
As mentioned above, making the space inside the reed smaller can help to raise the pitch. Another way to achieve this is to slide the overlap.
If you look at the first diagram below, you will notice how one blade is peeking out from behind the other on the left side. This sliver of cane is called the overlap, and can usually be found on the left side of the reed. As shown in the diagram, use your thumb to push the top blade to the right while using your index finger to pull the back blade to the left. Gently sliding the blades in this direction will increase the overlap size and decrease the space inside the reed.
In some reeds, the overlapped blade is on the right side. In this case, reverse the directions that you slide the blades. Pull the top blade to the left while pushing the back blade to the right.


Using Sandpaper

If squeezing the reed doesn’t improve the response, you now need to remove cane from the end of the tip so it will vibrate more easily. This is usually done with a reed knife, but sandpaper could be used as an alternative. This method takes off much less cane and with much less precision than a reed knife would, so it’s best to expect only minor improvements in the reed’s response when using sandpaper.
In my experiment I used a super fine 600-grit sandpaper. Coarser sandpaper can also be used, but make sure to be very gentle with it in order to prevent tears in the very thin cane at the tip of the reed. For better control, I cut a small rectangle of sandpaper and folded it in half, using the edge to contact the reed as I would scrape with a reed knife.
Sanding the Tip
When a reed is resistant, the first place to check is the thickness of the tip. The vibrations start at the thinnest part of the reed: the corners of the end of the tip. These vibrations travel most easily to the rest of the reed when the transition is scraped into a bottleneck shape.
Check the profile view of your reed and pay attention to the shape of the tip. Envision what parts need to be removed in order to achieve a bottleneck shape. This is where we will sand the reed.
As a reference, these pictures are of the same reed before and after I tapered the tip and contoured the transition into a bottleneck. This scraping was done with a reed knife. Do not expect to be able to achieve this much of a difference while only using sandpaper! This diagram is just to show the shape we’re striving for.


The most effective place to sand is the final few millimeters of the tip. Drag the sandpaper off the end of the tip the same way that someone would scrape off the end of the tip using a knife. Only sand in one direction, away from you, as sanding backward from the end of the tip could crush or tear the thin cane!


Sanding the tip takes off minuscule amounts of cane at a time compared to scraping with a knife, so stay patient! Keep testing the reed as you work to sand the tip down. You might be surprised at how big a difference you feel in the resistance compared to the small amount of cane you removed.
Other Places to Sand
In my experiment, even after sanding the tip as much as I could, I still thought that the reed felt resistant and held open. I could see some bulk at the sides of the top of the plateau, so I tried to sand this down so that the plateau transitioned more smoothly down to the base of the tip.


Sanding here did improve the response of the reed, and I was impressed that I achieved such a result without using a reed knife! Of course, the process would have been much quicker and more refined with the use of a reed knife, but this method might be worth a shot as a last resort if your reeds are just too resistant to play on.
Clipping the Tip
Once your reed has a comfortable resistance, it is time to address the intonation. The biggest intonation issue I see among students who aren’t yet making reeds is flatness. If your intonation is flat even address your air speed and air support, and after squeezing the reed and sliding the overlap, then it is time to clip your reed.
Clipping your reed helps to raise the pitch by shortening the length of the reed. However, it also makes the tip of your reed thicker by comparison and will increase the resistance. For this reason, only try clipping your reed if it is both easy AND flat.
Using a Razor Blade or Knife
Oboists typically clip their reeds using very sharp razor blades and a cutting block for a great amount of control and precision in their clipping. You can find razor blades at the hardware store and can clip against any solid surface. Many oboists clip the tip using their reed knife instead of a razor blade, so you could probably do the same with a sharp and precise kitchen knife.
Please be careful when handling very sharp tools!
When clipping the tip, always err on the side of taking off too little cane. You can always clip again to take more off, but if you take off too much you can never put the cane back! Try to only clip a fraction of a millimeter of cane off at a time.
Play on the reed before and after each clip to assess the change in pitch and resistance. Remember that the more you clip off, the more change you will notice in pitch but especially in resistance. It’s very common to have to go back to fixing resistance after taking a clip.


Using Scissors
I would only advise clipping with scissors as a very last resort! As it’s so easy to clip too much reed when using scissors, only do this if you reed is very flat and VERY easy.
In my experiment clipping my Amazon-bought student reed, the reed was extremely easy. It responded even with a very weak airstream, and played almost a half step flat. I was confident that clipping the tip with scissors would help both the response and the intonation of the reed.
As always, try to snip off as little cane as possible when snipping with scissors. I found that I couldn’t be very precise at all with my scissors. It was hard to see exactly where the scissor blades were going to land on the cane. In my attempt to snip off only a fraction of a millimeter, I ended up snipping off more than a millimeter. (This may sound like nothing, but to a reed maker, that is a HUGE difference!)

Making a snip of that size was enough to make the resistance hard again, negating all of the work I had previously done with the sandpaper. After snipping I was able to get the resistance easy again, but it was a time consuming process.
While you may use this method if you are desperate to get a reed up to pitch, I would advise only trying to snip with scissors if you have a backup reed to play on!
Reviving Older Reeds
Clean it Out
Sometimes response issues in older reeds are a result of gunk buildup on the inside. One way is to blow through the reed from the cork side to dislodge anything that may be stuck inside. You can also do this while holding the tip of the reed in a cup of water, blowing though the cork like you might blow bubbles in water with a straw.
Another way to clean out your reeds is to take a pipe cleaner through it. Please use a real pipe cleaner, not a craft pipe cleaner, which will be too thick to pass through the reed! Make sure there is no debris or dust on the pipe cleaner, then pass it FROM THE CORK END up through the tip. Only pull in one direction - pulling it back down through the cork end will ruin the tip! Gently pull the pipe cleaner from side to side to catch any gunk that may be on the inside of the reed.
Check the Tip for Cracks

Sometimes the cause of response issues is a crack in the tip of the reed, which interrupts vibrations. Reeds that are missing parts of the tips on the side (“missing corners”) will still play, although their response may be a little harder than before and the tone quality may be more brash. However, if a reed looks fine but is mysteriously very resistant, check the end of the tip for cracks. Sometimes they are hard to spot!

Another way to spot cracks is to look down the opening of the reed and gently squeeze it closed. Watch the way the reed closes - if there appears to be a break in the curvature as you close it, there is a crack. Chips and cracks in the middle of the tip unfortunately cannot be fixed.
Final Thoughts
Sometimes your old reed will have served its purpose, and it’s time to move on. Work with your teacher to find a trusted reed source that can supply you with reeds that feel comfortable for you the play and help you sound your best.
I hope that this guide has provided you with a few ideas to try in order to play around with your reeds. It’s good to gain a basic understanding of how your reed works so that you’re able to experiment with adjusting and observing the effect in how it plays, even if you don’t have access to your teacher’s help or reed tools right now.
I hope that you have been inspired to take charge and learn something about your reeds in the meantime. Happy reed adjusting!